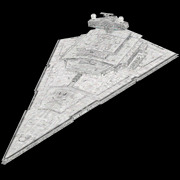
Battleking
 | |
| Battleking | |
|---|---|
| Production information | |
| Class | Imperial I-class Star Destroyer |
| Technical specifications | |
| Length | 1,609 meters |
| Maximum speed (space) | 60 mglt |
| Engine unit(s) |
|
| Hyperdrive rating |
|
| Shielding | 4800 SBD |
| Hull | 2272 RU |
| Armament |
|
| Complement |
|
| Crew |
|
| Minimum crew | 5,000 |
| Passengers | 1,800 |
| Cargo capacity | 36,000 metric tons |
| Consumables | 6 years |
| Other systems | HoloNet Transceiver |
| Usage | |
| Role(s) |
|
| Earliest sighting | PBF 601 |
| Destroyed | PBF 612 |
| Present for battles/events |
|
| Affiliation | Galactic Empire |
| Known commander(s) | Captain Adolain |
Imperial vessel, commanded by Captain Adolain. Head of an Imperial task force.
History
Witnessed by Republic Shield reconnaissance force to arrive at an Imperial rendezvous point somewhere near the Cadrel Expanse and the Greeop Sector. (PBF601)
Stationed at the vessel’s fleet buildup during Republic Shield hit and fade mission. Attempted to destroy the interloping forces, but failed, allowing significant Imperial losses, including the Frigates Treacherous and Perilous. (PBF602)
Lured Republic Shield forces led by the Calamari Cruiser Windstorm through an asteroid field, and waited on the far side of the navigational hazard with its shields down, to draw the Windstorm’s escorts to the vessel, leaving the Calamari Cruiser undefended. When the Windstorm’s forces were close enough to the vessel to identify it, the attack was launched, and a group of corvettes appeared on the edges of the asteroid field and engaged the escort-less Windstorm directly, while the vessel left the engagement by entering hyperspace. (PBF603)
Reinforced Imperial forces led by the Frigate Enigma which were being ambushed by Republic Shield forces led by the Calamari Cruiser McGrath in an asteroid field. The McGrath’s forces were beating the Enigma into submission when the vessel arrived, and the Imperial reinforcements turned the attack back onto the Calamari Cruiser. The Frigate Enigma eventually fell, but Imperial forces bombarded the McGrath, with the transport group Kappa launching from the Frigate Quickdraw in an attempt to disable the Calamari Cruiser. However Republic Shield forces were able to abate the Imperial attack, sparing the McGrath from destruction or capture. Led Imperial forces in a retreat from the combat zone, while Republic Shield forces successfully repaired and escaped with their disabled corvette that baited the Enigma. (PBF607)
Attended a meeting with the Star Destroyer Arcanus, with corvettes Attrition I and Attrition II patrolling the rendezvous point. The Calamari Cruiser McGrath arrived and led Republic Shield forces in scanning the Star Destroyers, forcing an adjournment of the meeting. Launched light defences to keep the attacking forces busy whilst the Star Destroyers withdrew from the combat zone. The Calamari Cruiser McGrath attempted to pursue the vessel, but the corvettes Attrition I and Attrition II bravely blocked the McGrath’s path, resulting in their demise, but preventing the Calamari Cruiser from tracking the vessel as it entered hyperspace. (PBF609)
After discovering the location of the Calamari Cruiser McGrath, the vessel led an Imperial task force to destroy the Republic Shield task force. However, the McGrath’s forces were not as unprepared as expected, and were strengthened by the Calamari Cruiser Windstorm which had rendezvoused with it. Confronted the Calamari Cruisers, while supported by the Frigates Maelstrom and Phantasm, and the corvettes Razorwire and Attrition III, which flanked the vessel in preparation for the assault. Led Imperial forces against Republic Shield forces led by the Calamari Cruiser McGrath. Republic Shield and Imperial forces both took hits as the battle raged, but eventually Republic Shield forces pushed back the Imperial attack line, and the Calamari Cruisers manoeuvred to withdraw from the area, raking nearby vessels with fire as they went. The Calamari Cruisers successfully withdrew from the combat zone, despite the efforts of the vessel’s forces. Imperial forces had been battered so much that the remaining Republic Shield forces were able to successfully knock out the vessel’s support ships, finally leaving the vessel relatively vulnerable. Attempts to swat the attacking forces failed as the vessel had been bombarded extensively during the attack. Finally fell, unable to content with the Republic Shield task force that the vessel had challenged. Destroyed by Republic Shield forces. (PBF612)