Conflict Maps (draft)
Contents
39:9
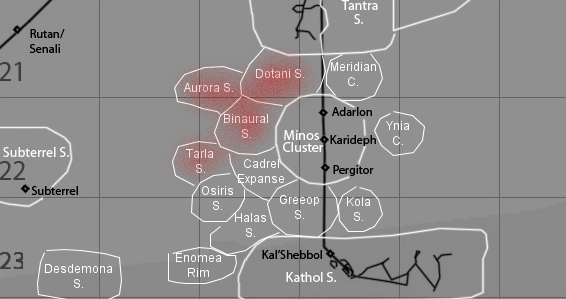
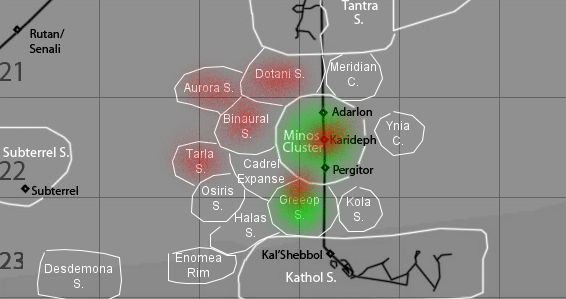
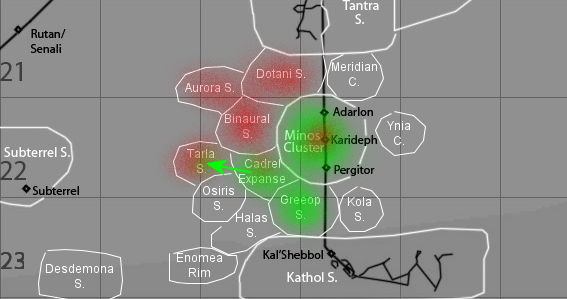
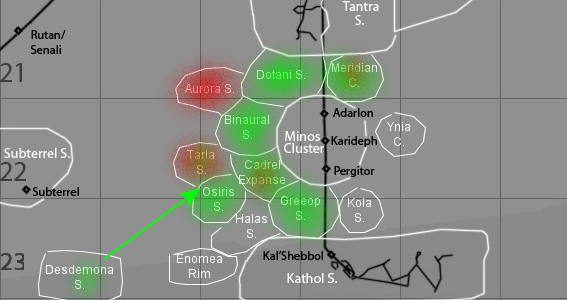
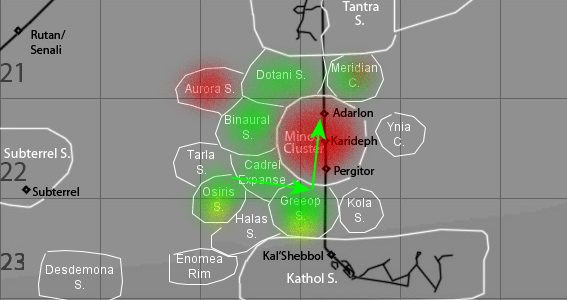
Conceptual formation of 'Task Force Republic Shield' by military officials in the New Republic. Approved by Admiral Ackbar, resources organised and plans developed for the actualisation of the concept. Prime directive: to serve as a buffer for the New Republic from the Rim-based Imperial factions, specifically the faction based out of the Aurora Sector, and controlling the Binaural, Dotani and Tarla Sectors.
40:4
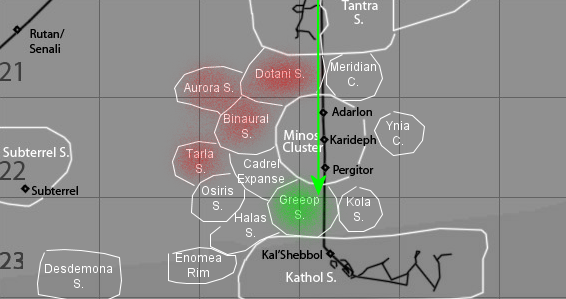
Task Force Republic Shield established in the Greeop Sector. Over the greater part of a year the task force established its presence in the sector and gradually built itself into a military unit capable of directly engaging the Imperial menace.
41:2
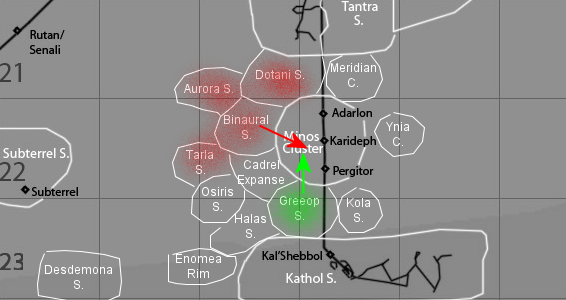
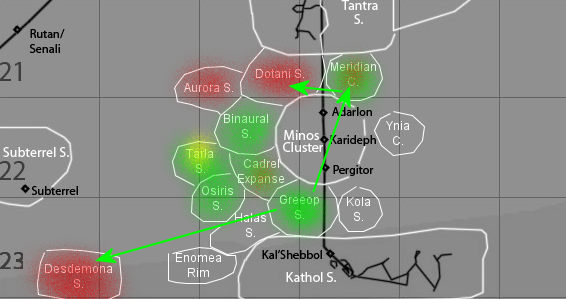
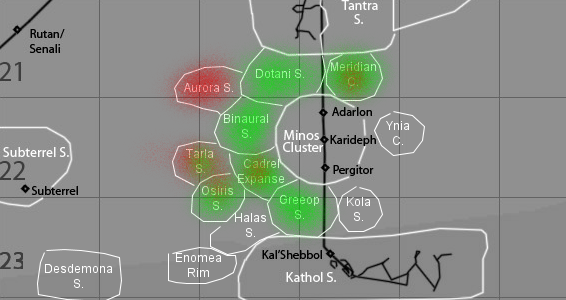
Imperial forces boldly attempted to spread their influence into the Minos Cluster. Task Force Republic Shield opposed them, and participated in their first major military conflict. (Minos Conflict)
41:4
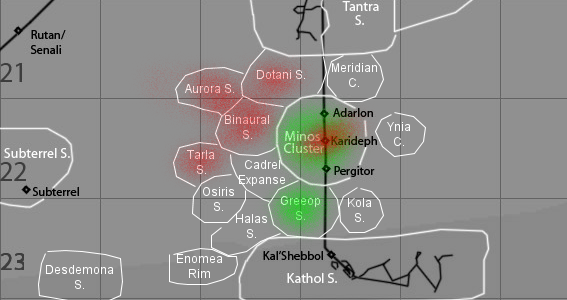
Task Force Republic Shield was victorious in the Minos Cluster, defeating the impressive Imperial forces in a closely-matched military campaign. The task force established itself as a dominant force to be reckoned with in the fringe Outer Rim territories, and through the conflict and subsequent victory earnt the nickname 'Rebel Squadrons'. (Minos Conflict)
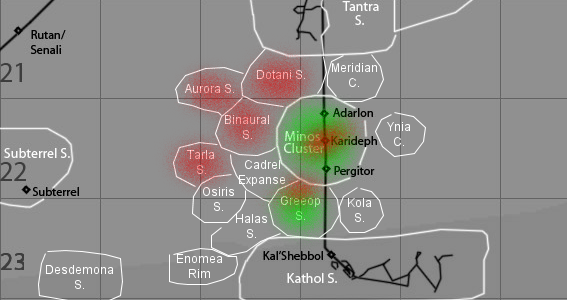
Despite the major victory, Imperial insurgent forces remained hidden in the cluster, and launched hit-and-fade attacks at the victors, supported and supplied from their home territories. (PBF Tour 1)
41:6
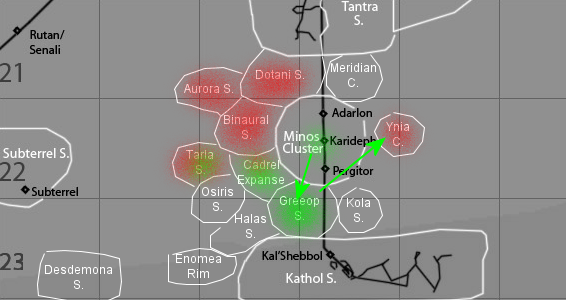
Imperial forces, finally acknowledging the threat of the RS task force, skirmishes with RS forces on the Greeop Sector border. (R2F Tour 4)
In the Minos Cluster, RS forces continue to root out Imperial insurgents. (PBF Tour 1)
41:9
Desite the increasing threats of the Imperial forces in the Minos Cluster (or perhaps because of this fact), all RS outposts in the cluster are abandoned. RS forces continue to battle with Imperial forces, which have brought to bear a proper starfleet from their home territories to destroy the RS forces. (PBF Tour 2)
RS forces weather the Imperial attacks against the Greeop Sector outskirts. (R2F Tour 4)
42:1
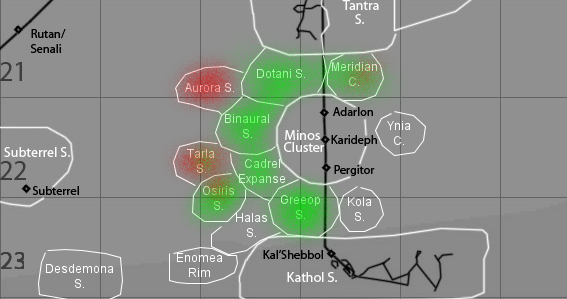
While the balance of power in the Minos Cluster shifts back and forth between the RS and Imperial forces (PBF Tour 2, PBF Tour 3), Imperial opportunists continue to harass the Greeop Sector border. (R2F Tour 5)
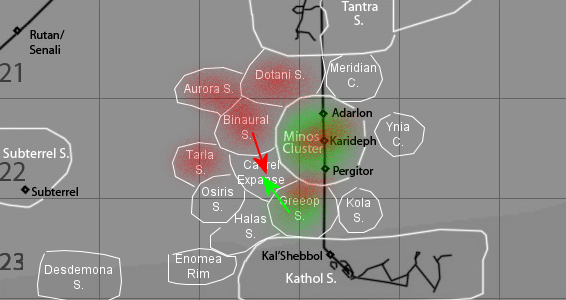
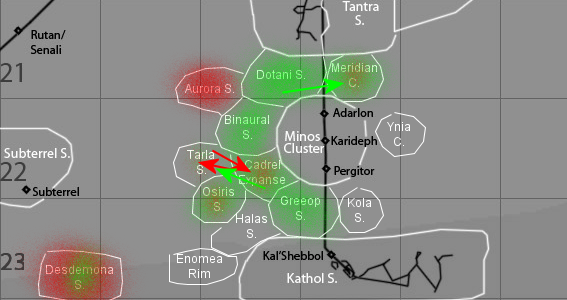
Hoping to catch the RS off-guard with the continued conflict in the Minos Cluster, Imperial forces launch an invasion of the Cadrel Expanse. However, despite the continued events in the Minos Cluster and the fight on their doorstep, the RS moves to deny the Cadrel Expanse to the invading Imperial forces. (Outer Rim War)
42:2
As the Cadrel Expanse conflict rages (Outer Rim War), and RS forces struggle for dominance of the Minos Cluster (PBF Tour 3), RS forces successfully repell the Imperial forces on the Greeop Sector border. (R2F Tour 5)
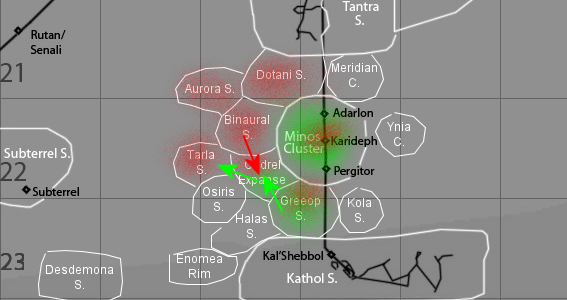
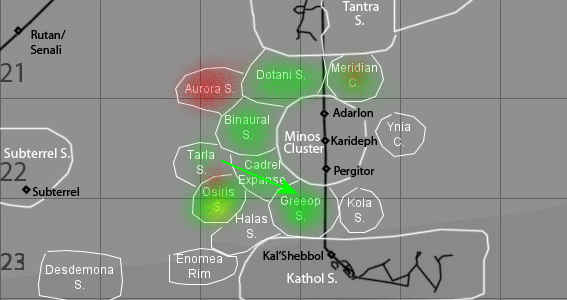
With the campaign in the Cadrel Expanse campaign proceeding well, RS forces probe the nearby Tarla Sector, searching for hidden Imperial outposts. (Operation: Blade)
RS interest in the Tarla Sector intensifies when an RS vessel is lost while responding to an alient distress signal. (RgF Tour 1)
42:3
The Cadrel Expanse comes under almost total RS control, bar one impregnable Imperial system, as the RS achieve another significant victory, defeating the Imperial forces vying for the cluster. (Outer Rim War)
The Minos Cluster's fate is not as certain, as RS forces struggle to content with the Imperial forces arrayed against them. (PBF Tour 3)
On the homefront, RS forces successfully defeat opportunistic Imperial forces that slipped through the lines to harass the Greeop Sector outskirts. (R2F Tour 5)
The RS investigation of the Tarla Sector intensifies, as resistance forces from an Imperial-occupied world in the sector plead for liberation (RgF Tour 1), however these efforts are complicated by the underestimation of the Imperial presence in the sector: A Super Star Destroyer, with accompanying starfleet, is discovered during a botched RS raid, forcing elementsof the RS fleet to retreat to safer holdings while reinforcements can be summoned (Operation: Blade). The campaign for the liberation of the alient world proceeds, but more cautiously, now that there is a Super Star Destroyer and known fleet to evade. (RgF Tour 1)
Along with the peripheral liberation objectives, the RS decides to eliminate the threat of the enemy Super Star Destroyer, if possible, with the primary goal of destroying the major Imperial shipyards of Tarla Minor. (IBG Tour 1)
In the recently conquered territory of the Cadrel Expanse, RS forces occupy the territory, to establish a more firm presence, and to destroy any activities of the barricaded Imperial threat that seemed semi-contained for the time being. (R2F Tour 6)
42:5
RS forces in the Minos Cluster are triumphant, annihilating much of the enemy fleet, and driving the remnants from the cluster. In theme with the abandonment of RS outposts in the Minos Cluster, the standing forces withdraw back to home territories, too, for redeployment. (PBF Tour 3)
In the Tarla Sector, the operations proceed successfully, with the liberation of the Imperial-occuipied world of T'Ser and the T'Seran people (RgF Tour 1), along with the razing of an Imperial shipyards facility, and a sabotage and destruction of a Super Star Destroyer undergoing construction there. (IBG Tour 1)
In the Cadrel Expanse, RS forces tangle with forces that breach the Imperial containment zone and run amock, successfully luring RS forces into a devastating ambush. RS forces are victorious, but barely survive the battle. (R2F Tour 6)
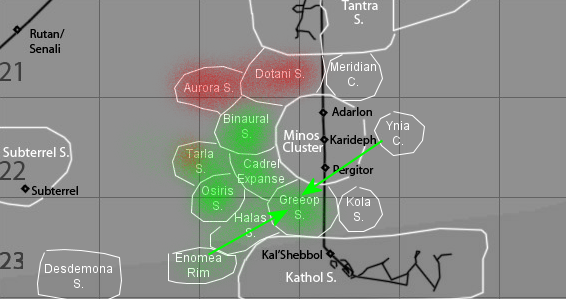
Further afield, the Independent Ynian Fleet, a resistance group from the Ynia Cluster request and receive military support to help contest the Imperial forces occupying the region. (Operation: Zodiac)
42:6
The Imperial forces in the Tarla Sector are harassed and worn down by the continued assaults and activities of the RS Tarla Strike Force, with the Tarla Minor system defences razed, paving the way for an assault on the Tarla Minor Shipyards themselves. (IBG tour 1)
With the Tarla Sector almost under RS control, shipping interdiction and patrols are set up to search any vessels which might be assisting the Imperial war effort. (RgF Tour 2)
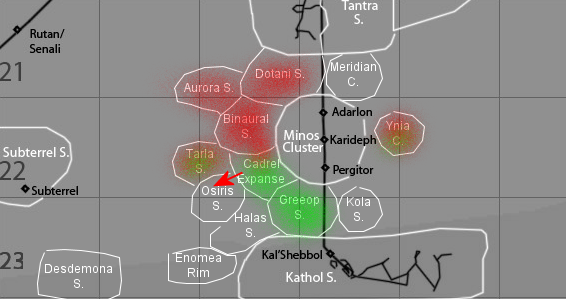
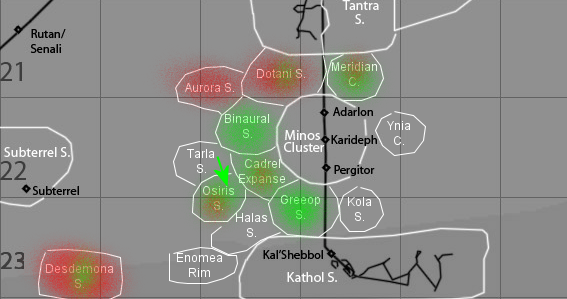
RS forces stationed in the Cadrel Expanse succeed in driving out some escaped Imperial forces, however they sucessfully fall back to the populated Osiris Sector, and begin fortifying the sector, occupying the civilian worlds to fund their defensive measures.
And in the Ynia Cluster, RS and IYF forces plan their continued disruption of Imperial control of the region.
42:7
The Imperial bastion of power in the Tarla Sector is broken, as RS forces raze the Tarla Minor Shipyards, destroying all defending forces, and then proceeding to track and bombard into oblivion the enemy Super Star Destroyer. (IBG Tour 1)
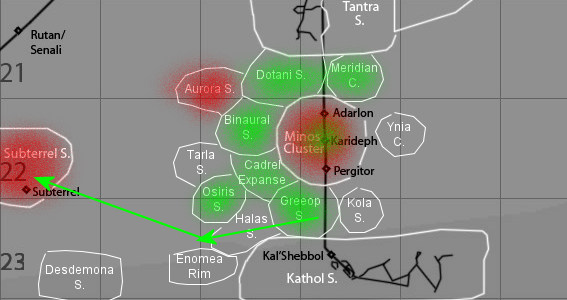
However, some hidden elements seem to remain, as RS forces interdict muntions supplies being shipped by pirates to Imperial forces. RS forces launch undercover operations to deliver the shipments, in an effort to trace the guerilla Imperial forces back to their hidden outpost. (RgF Tour 2)
RS forces move to deny Imperial forces the lucrative Osiris Sector, and clash in the territory, hoping to unhinge the Imperial hold on the region. (R2F Tour 7) To this end, RS forces proceed to establish an outpost on the edge of the sector. (IBG Tour 2)
In the Ynia Cluster, the guerilla war against the occupying Imperial forces continues. (Operation: Zodiac)
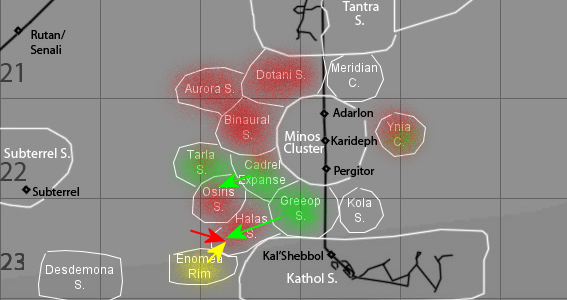
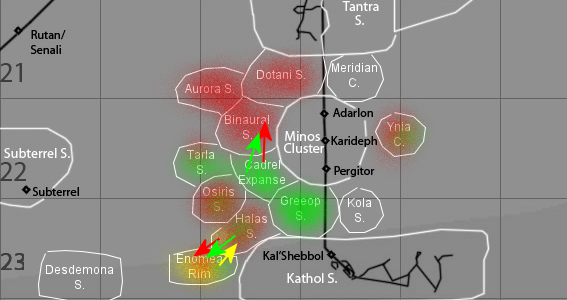
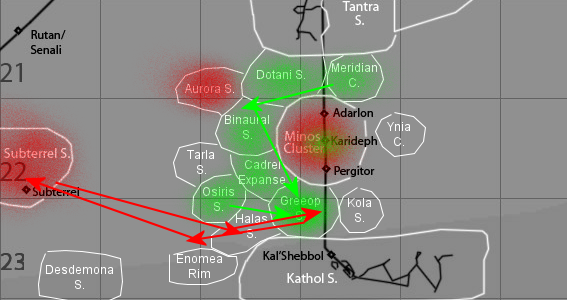
On the homefront, RS forces detect an Imperial shipping lane in the Halas Sector, uncomfortably close to the Greeop Sector, and move to investigate and hamper Imperial efforts. (PBF Tour 4)
42:8
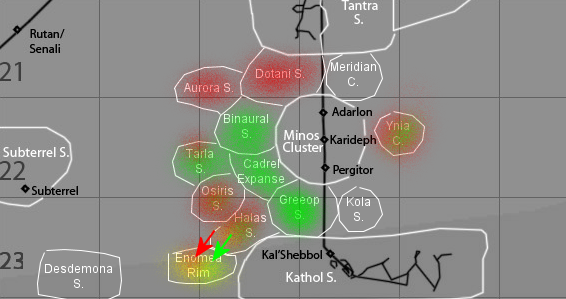
The situation in the Halas Sector became more complicated, with the arrival of a pirate faction known as the White Guard, who initially helped RS forces assault the Imperial incursive forces, but who eventaully betrayed and attacked them once the Imperial forces were cowed. It was eventually revealed that the Imperial forces were in the Halas Sector to exact revenge on the treacherous White Guard, which had maniacal aspirations of conquering both Imperial and RS forces alike and ruling the Outer Rim. (PBF Tour 4) In response to the betrayal, RS forced launched an undercover operation to infiltrate the White Guard and attack them from within. (Paladin Tour 1)
In the Tarla Sector, RS forces continued their undercover investigation into the hidden Imperial base (RgF Tour 2), while in the Osiris Sector, RS forces continued the establishment of New Trassk Base. (IBG Tour 2)
RS forces continued to support the Ynian resistance forces undermine local Imperial control in their bid for freedom. (Operation: Zodiac)
In the Osiris Sector, RS forces succeeded in dislodging the Imperial occupation of the sector, with only fleeing remnants to chase or crush further. (R2F Tour 7)
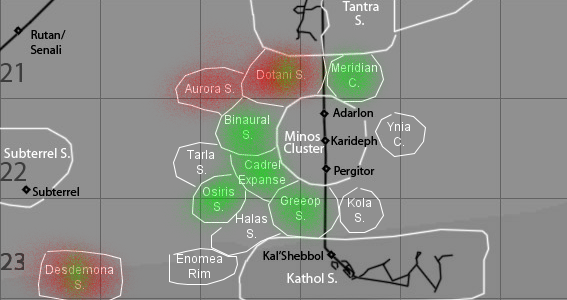
And in an extremely bold move, RS forces attacked the final bastion of Imperial power in the Cadrel Expanse, and used it as a beachhead for a major incursion into the Binaural Sector, conquering territory as they went with Imperial forces barely able to slow the invading forces down. (Outer Rim War II)
42:9
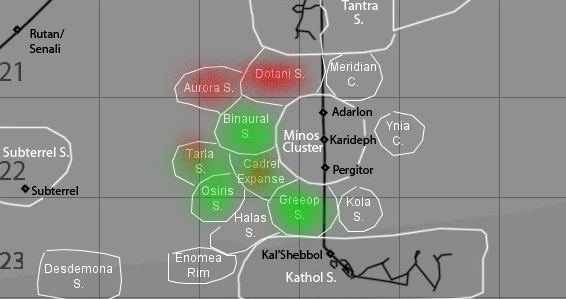
In another landmark victory, RS forces completely conquered the Binaural Sector, wiping out any semblance of resistance in the sector, destroying, capturing or driving off any Imperial survivors. (Outer Rim War II)
RS undercover forces deepened their infiltration into the White Guard in the Halas Sector and Enomea Rim (Paladin Tour 1), while RS forces clashed with the White Guard fleet, pushing steadily through White Guard territory. (PBF Tour 4)
The hunt for Imperial forces in the Osiris Sector slowed, as any surviving forces remained hidden from the searching forces (R2F Tour 7). The RS outpost of the sector, New Trassk Base, was more firmly established, with a permanent RS presence intended to be centred around it. (IBG Tour 2)
And in the Tarla Sector, undercover RS forces continued their investigations attempting to locate the hidden Imperial outpost. (RgF Tour 2)
42:10
PBF Tour 4 (ends) Paladin Tour 1 (ends) RgF Tour 2 IBG Tour 2 Operation: Zodiac (ends) R2F Tour 7 (ends)
43:1
43:2
43:3
43:5
43:6
43:7
43:8
43:9
43:10
44:1
44:2
