Horizon
 | |
| Horizon | |
|---|---|
| Production information | |
| Class | EF76-B Nebulon-class escort frigate |
| Technical specifications | |
| Length | 300 meters |
| Width | 72 meters |
| Height/depth | 166 meters |
| Maximum acceleration | 1200 g |
| Maximum speed (space) | 12 mglt |
| Maximum speed (atmosphere) | 800 km/h |
| Engine unit(s) | Kuat Galaxy-15 ion engines (7) |
| Hyperdrive rating |
|
| Shielding | 2,560 SBD |
| Hull | 1520 RU |
| Armament |
|
| Complement |
|
| Crew |
|
| Minimum crew | 307 |
| Passengers | 75 troops |
| Cargo capacity | 6,000 metric tons |
| Consumables | 2 years |
| Usage | |
| Role(s) |
|
| Earliest sighting | IBG 101 |
| Present for battles/events |
|
| Affiliation | Rebel Squadrons |
| Known commander(s) |
|
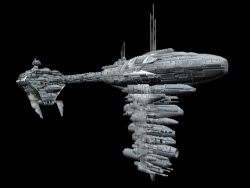
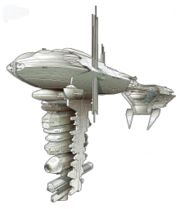
The Horizon is a Republic Shield KDY EF76-B Nebulon-class escort frigate that currently serves as the escort of the Redemption in the Subterrel Strike Force.
History

Part of Republic Shield task force led by Calamari Cruiser Engel in assault against Imperial convoy near a red nebula (#98) en route to Tarla Minor Shipyards. Completely destroyed convoy. (IBG101)
Arrived to reinforce the fleet build-up preparing to assault the Tarla Minor Shipyards. Arrived at the build-up just after the fleet fought off Imperially-funded pirate attack by mercenary forces led by the Frigate Xenesis. (IBG104)
Present at the build-up near a cloudy planet (#9) on the edge of a green dust nebula (#66) during a Republic Shield undercover information-retrieval mission by the assault transport Lambda. (IBG105)
Part of the Tarla Strike Force assault against the Imperial Super Star Destroyer Tyrannic and its supporting fleet at an Imperial construction facility near a blue and brown planet (#26) orbiting a white star (#91) on the edge of a blue nebula (#68), led by the Calamari Cruiser Rebel Fist. Part of task force that directly engaged the Star Destroyer Collaborator and the Victory Star Destroyer Supernova. In the aftermath of the battle, relocated to the rendezvous point near a blue and black gas planet (#34). (IBG106)
Present at the fleet build-up near a cloudy planet (#9) during a Republic Shield recovery mission of a supply convoy, which was in the process of being captured by Imperial forces led by the Star Destroyer Sustainer before the Calamari Cruiser Rebel Fist’s forces disabled and captured the Star Destroyer, and rescued the convoy. (IBG107)
Rendezvoused at a neutral fuel and supply depot in Imperial space. Left Republic Shield forces behind while the vessel entered hyperspace, to destroy any Imperial scouts attempting to follow the fleet. (RgF110)
Part of Republic Shield and T’Seran Resistance task force led by the Calamari Cruiser Ad Astra in the liberation of the T’Seran system from Imperial occupation. Stumbled upon Imperial patrol, and left the Frigate Unforgiven to deal with the patrol force whilst the rest of the task force headed further in-system to begin the battle with the Imperial defenders. (RgF111b)
Present at the fleet build-up near a blue and brown planet (#46) and a blue nebula (#68) during Republic Shield assault on the Jardal pirate base. (IBG108)
Led random inspection of neutral vessels travelling through Republic Shield space. Republic Shield forces discovered illegal weapons and TIE starfighters aboard the cargo ferry Dinop and the corvette Red Star, and sent assault transport group Storm to capture the personnel of the vessels. Defended against mercenary forces that attempted to prevent the capture operation, led by the system patrol craft Dewrk. (RgF201)
Led Republic Shield forces in an ambush on Imperial convoy. Aided in foiling the efforts of Imperial defenders, led by the Dreadnaught Suilu. Aided in the destruction of the entire convoy, including its defensive detail. (RgF208)
Led Republic Shield forces in an ambush of the Star Destroyer Deathbringer, which resulted in the destruction of the Deathbringer’s support ships, and the disabling of the Star Destroyer itself. Launched a boarding party onboard the transport Spectre to storm the Deathbringer and capture the Imperial Warlord Admiral Cohn. Ensured Republic Shield superiority of the battle zone while the Spectre performed its operation. The arrival of Imperial reinforcements sent the entire mission awry, as the Frigate Daveen II exited hyperspace directly above the Deathbringer, and destroyed the transport Spectre in one volley. The Dreadnaught Skami led Imperial forces in engaging the remaining Republic Shield defence forces while the Strike Cruiser Banton engaged the vessel directly, forcing it to withdraw from the engagement. Left the battle zone as the Muurian transport Phito commenced repairs on the Deathbringer. (RgF305)
Reinforced the Interdictor Raging Dragon, which had trapped the Star Destroyer Deathbringer in its interdiction field as the Star Destroyer made its escape from the Star Destroyer Wyvern’s assault on Chasm base. Imperial and Republic Shield forces were pounding the Raging Dragon and the Deathbringer, respectively, when the vessel arrived. The arrival effectively countered the presence of Imperial reinforcements led by the Dreadnaught Serpentine. Took up a flanking position on one side of Serpentine while the Strike Cruiser Apostate moved to pin the Dreadnaught down on the opposite flank. The Serpentine was overwhelmed by the Apostate and the vessel, while Republic Shield forces pounded the Star Destroyer Deathbringer into submission before overwhelming and destroying it. (RgF312)
Part of Republic Shield reinforcements led by the Strike Cruiser Kayak to help bolster Republic Shield and Coronet Security Agency forces led by the Frigate Tango Base in protecting a Corellian convoy being assaulted by Imperial forces led by the Dreadnaught Aquarius and backed up by the Strike Cruiser Scorpio near the nav buoys XTR25N and XTR25S. The convoy was attempting to reach nav buoy XTR25S from nav buoy XTR25N, with Imperial forces attempting to destroy them before they could reach their hyperspace points. The Strike Cruiser Kayak pinned the Strike Cruiser Scorpio down between it and the Frigate Tango Base, raking it with fire, while the vessel directly engaged the Dreadnaught Aquarius. Eventually the Imperial attack force was broken, with both the Dreadnaught Aquarius and the Strike Cruiser Scorpio falling to overwhelming fire from Coronet Security Agency and Republic Shield forces. The majority of the convoy successfully proceeded to the jump point, but there were losses: the modular conveyor Yensho III, the shuttle Escort II, and a freighter from the freighter group Dimorra failed to make the crossing intact. (RgF409)
Modifications

Behind the Scenes
External Links
Warships of the Subterrel Strike Force: