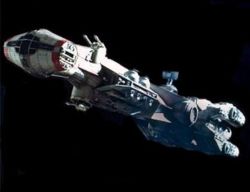
VRK II
Corellian vessel, carrying capacitors.
History
Part of a convoy ambushed by Imperial forces led by the Dreadnaught Aquarius near the navigation buoys XTR25N and XTR25S. Imperial forces led by the Dreadnaught Aquarius assaulted the convoy, attempting to prevent it from surviving the journey from the navigation buoy XTR25N to the navigation buoy XTR25S. The escorting Coronet Security Agency forces led by the Frigate Tango Base were hard-pressed to hold back the assault force, however Republic Shield forces answered the convoy’s distress calls and helped Coronet Security Agency forces in holding the Imperial attack force at bay until reinforcements arrived. Unfortunately, the first reinforcements to arrive were Imperial, as the Strike Cruiser Scorpio entered the area and began directly engaging the Frigate Tango Base, while Imperial reinforcements pressed the attack on the convoy. Thankfully Republic Shield reinforcements led by the Strike Cruiser Kayak arrived to crush the Imperial assault force. The Kayak pinned the Strike Cruiser Scorpio down between it and the Frigate Tango Base, raking it with fire, while the Frigate Horizon directly engaged the Dreadnaught Aquarius. Eventually the Imperial attack force was broken, with both the Dreadnaught Aquarius and the Strike Cruiser Scorpio falling to overwhelming fire from Coronet Security Agency and Republic Shield forces. The majority of the convoy successfully proceeded to the jump point, but there were losses: the modular conveyor Yensho III, the shuttle Escort II, and a freighter from the freighter group Dimorra failed to make the crossing intact. (RgF409)
