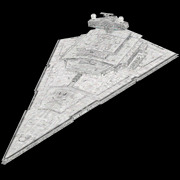
Wyvern (ISD)
 | |
| Wyvern | |
|---|---|
| Production information | |
| Class | Imperial I -class Star Destroyer |
| Technical specifications | |
| Length | 1,609 meters |
| Maximum speed (space) | 60 mglt |
| Engine unit(s) |
|
| Hyperdrive rating |
|
| Shielding | 4800 SBD |
| Hull | 2272 RU |
| Armament |
|
| Complement |
|
| Crew |
|
| Minimum crew | 5,000 |
| Passengers | 1,800 |
| Cargo capacity | 36,000 metric tons |
| Consumables | 6 years |
| Other systems | HoloNet Transceiver |
| Usage | |
| Role(s) |
|
| Affiliation | Rebel Squadrons |
Republic Shield vessel.
History
Led Republic Shield reinforcements to the Polaris IV station, where a T’Seran Resistance delegation aboard the shuttle Deliverer was being pursuit by Imperial forces led by the Star Destroyer Gargant. Republic Shield forces were screening the Deliverer, holding back the Imperial attack; however the arrival of Republic Shield reinforcements sent the Imperial pursuit force into full retreat. As the Gargant led Imperial forces from the combat zone, the shuttle Deliverer entered the vessel’s hangar. The Imperial retreat was hampered by a combined assault on the Gargant executed by the vessel and the Calamari Cruiser Ad Astra, which turned the Star Destroyer into scrap. (RgF103)
Reinforced Republic Shield forces defending the newly captured platform Renegade Base, and beat back the invading Imperial forces. Rallied Republic Shield forces to strike back at the Star Destroyer Dark Heart, destroying it and its forces. (RgF107)
Arrived to reinforce the fleet build-up preparing to assault the Tarla Minor Shipyards. Arrived at the build-up just after the fleet fought off Imperially-funded pirate attack by mercenary forces led by the Frigate Xenesis. (IBG104)
Stationed near the now-abandoned staging point near a blue and green planet (#53) not far from a major Imperial outpost during assault transport Lambda’s undercover operation to the outpost. (IBG105)
Part of the Tarla Strike Force assault against the Imperial Super Star Destroyer Tyrannic and its supporting fleet at an Imperial construction facility near a blue and brown planet (#26) orbiting a white star (#91) on the edge of a blue nebula (#68), led by the Calamari Cruiser Rebel Fist. Engaged enemy Star Destroyers. In the aftermath of the battle, relocated to the rendezvous point near a blue and black gas planet (#34). (IBG106)
Present at the fleet build-up near a cloudy planet (#9) during a Republic Shield recovery mission of a supply convoy, which was in the process of being captured by Imperial forces led by the Star Destroyer Sustainer before the Calamari Cruiser Rebel Fist’s forces disabled and captured the Star Destroyer, and rescued the convoy. (IBG107)
Rendezvoused at a neutral fuel and supply depot in Imperial space. Left Republic Shield forces behind while the vessel entered hyperspace, to destroy any Imperial scouts attempting to follow the fleet. (RgF110)
Part of Republic Shield and T’Seran Resistance task force led by the Calamari Cruiser Ad Astra in the liberation of the T’Seran system from Imperial occupation. Stumbled upon Imperial patrol, and left the Frigate Unforgiven to deal with the patrol force whilst the rest of the task force headed further in-system to begin the battle with the Imperial defenders. (RgF111b)
Present at the fleet build-up near a blue and brown planet (#46) and a blue nebula (#68) during Republic Shield assault on the Jardal pirate base. (IBG108)
Present at the build-up near a murky orange planet (#33) orbiting a white star with blue halo (#90) during a failed supply raid by Republic Shield forces that were lured into an Imperial trap by survivors of the Jardal pirates, who escaped during the battle. (IBG109)
Left staging area near a blue and white planet (#36) orbiting an old white star (#85) to lead Republic Shield forces in an assault further in-system against the first of three major Imperial outposts barring the way to the planet Tarla Minor. Aided in the destruction of the Golan II station Outer Defence, the Inspection Platform, and all other defending Imperial forces, including the Escort Carrier Plague. (IBG110)
Part of the Tarla Strike Force led by the Star Destroyer Redemption. Fought in the Battle of Tarla Minor, destroying the Tarla Minor Shipyards and ensuring New Republic dominance of the system. (IBG111)
Stationed at the fleet build-up near the planet Tarla Minor while Republic Shield reconnaissance forces attempted to locate the escaped Super Star Destroyer Patriarch. A number of locations were scouted, including a zone near a red nebula (#73) and a cloudy planet (#9), but the Patriarch was finally located at a TIE Defender manufacturing facility near a purple planet (#52) orbiting a blue star (#89). Moved with the entire fleet to that location to begin the assault on the Super Star Destroyer. The Interdictor Senate prevented Imperial forces from evading the onslaught, as the rest of the fleet moved in. The Imperial forces had formed into layers of defence around the Patriarch, with outer perimeter forces covering the inner defences, which in turn covered the Super Star Destroyer. Directly engaged perimeter defence group vessels, specifically the Frigates Holok and Lapetta, and then pushed through to directly engage the Patriarch’s inner defences, specifically the Victory Star Destroyer Wazika. Destroyed enough forces to get in close enough to directly assault the Patriarch, contributing to its demise. (IBG112)
Led Republic Shield and defecting Imperial forces against the Star Destroyer Deathbringer’s primary outpost, Chasm base. Imperial reinforcements led by the Interdictor Vampirous arrived to cover the escape of the Deathbringer, and then engaged an interdiction field to prevent Republic Shield forces from pursuing the Star Destroyer. Led forces against the Chasm base and its defending forces, including the Vampirous and the Frigate Tintor. Despite the efforts of the defending Imperial forces, the Chasm base was destroyed followed soon after by the routing of the defensive forces. (RgF311)